Description:
Access Restriction by User Group is defined as a method of temporarily
restricting access to specified doors based on User Groups.
Theory of Operation:
Give the panel the ability to set a flag indicating access restriction for a specified User Group is active and the ability to clear said flag to return to normal operation for that User Group. These will be triggered by commands from Intelli-Site when it is necessary to temporarily restrict access to the specified User Group.
Implementation:
The implementation of the Access
Restriction by User Group is accomplished by modifications to the DLT as well
as additional modifications to the project file and screen objects. We will create lines of DLT for the panel to set an Access Restriction flag and to deny (or allow) access for the specific User Group while the flag is set. This flag will be set by an FDL command and cleared by a second FDL command.
Understanding the DLT editing screen
The DLT editing screen is broken into 3 parts: the DLT tree, the FDL list, and the definition of the line of DLT. The DLT tree is the left pane, and it lists all of the FDL Commands. Each FDL Command is associated with one or more lines of DLT. When an FDL Command is selected in the tree, all of the lines of DLT associated with that FDL is listed in the FDL pane on the upper right. When one of these is lines is highlighted, the details of that line are displayed beneath the FDL pane. Each line of DLT consists of an action, 2 conditions and a Boolean operator.
Modifying the DLT:
We will walk through the programming for the FDL Command Custom 110.1 which will be used to instigate the Access Restriction for the User Group. Then we will walk through the programming of FDL Command Custom 110.2 which will revert to the regular access.
Step 1. Add the Restriction
Flag:
In DLT
Counters, are used as flags. Setting the counter to 1 will set the flag, while setting
the counter to 0 clears the flag.
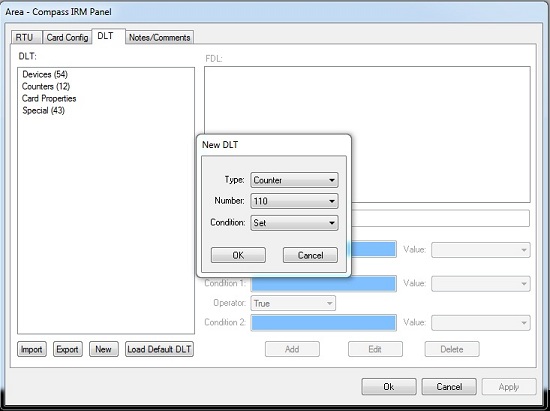
Start by adding a new FDL to the DLT with Type “Counter”, Number “110”, and Condition “Set”. This counter will be
our Restriction Flag.
Step 2. Add a
method to set the Restriction Flag:
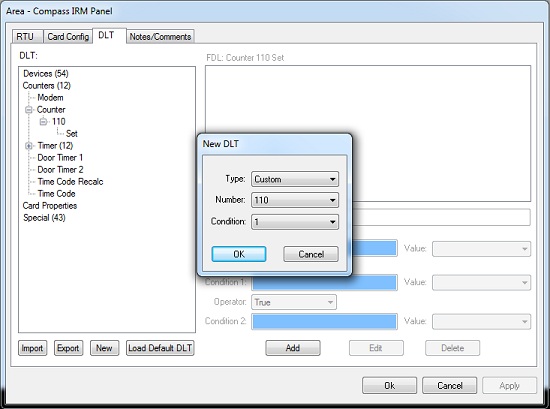
Add another new FDL to the DLT. Set the type to “Custom”, the number to “110” and the
condition to “1”. This will be the FDL triggered by the software to initiate
the Restriction.
Step 3. Add the Restriction
Logic:
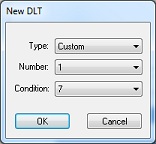
- Add a new
FDL. Set the type to “Custom”, the number to “1”, and the condition to “7”.
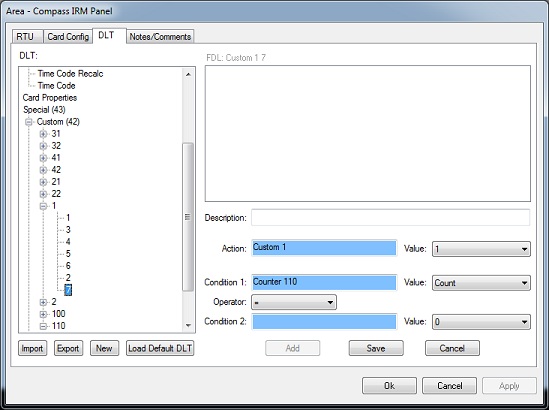
- Add
a new DLT to Custom 1.7. Set the action to Custom 1.1, and the Condition 1 to
Counter 110, Value “Count”. Set the Value for condition 2 to “0” and the
operator to “=”.
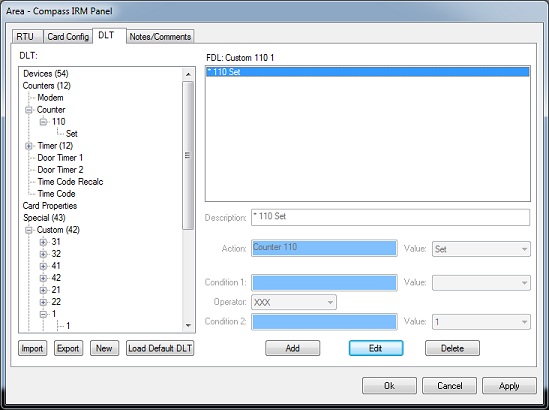
- Add a new DLT to the Custom 110.1. Drag counter 110 into
the action field, and set the “Value” field of condition 2 to “1”.
- Add another
new DLT to Custom 1.3. Set the Action to Custom 1.7 and set Condition 1 to “Card
User Group 1” and the value of Condition 2 to “4”. "Card User Group 1" can be found by expanding "Card Properties" in the DLT tree.
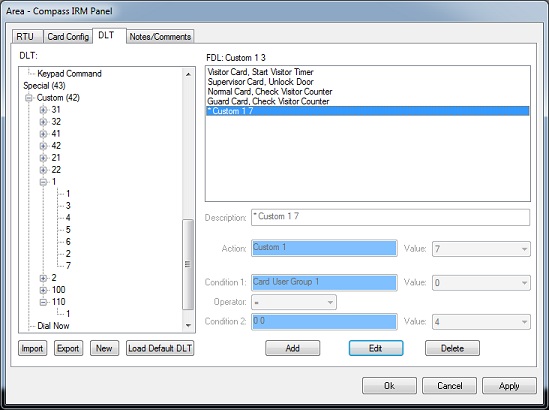
NOTE: There is a known issue with displaying a DLT that has blank Condition 2 with an '=' operator. The line of DLT is correct, the display is not.
Step 4. Add
Method to Revert Restriction.
Add a new
FDL. Set type to Custom, number to 110, and condition to 2. This FDL will
contain the code to reverse the Restriction operations.
Step 5. Add the
logic to Revert Restriction:
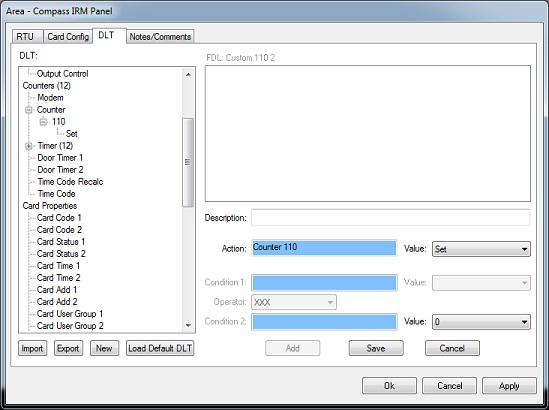
Add a new
DLT to Custom 110.2. Drag Counter 110 into the action field and set the value
of Condition 2 to “0”. This will clear the Restriction flag.
Modifying the project.
Step 1. Create the
FDL commands.
- Add an FDL
command to the panel, set the FDL to Custom 110.1.
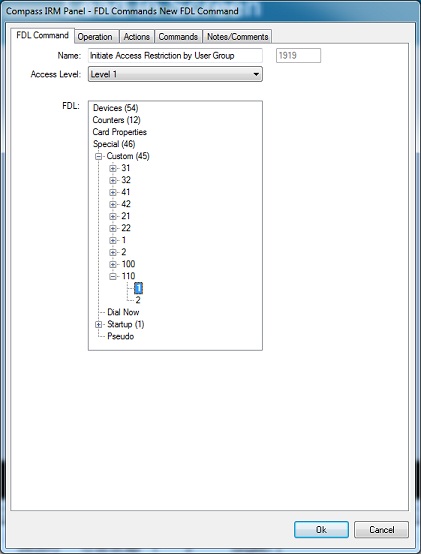
- Add a second FDL command
and set it to Custom 110, 2.
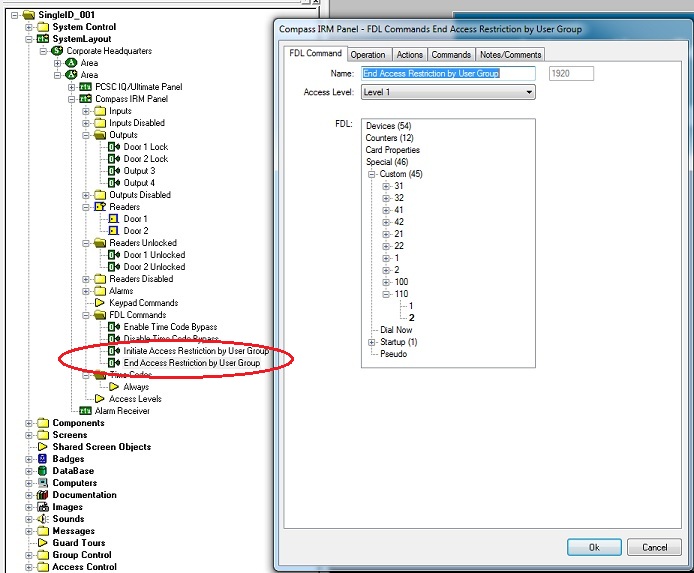
Pulsing the first FDL command sill enable the Restriction,
while pulsing the second reverts the Restriction.
Step 2. Update
the "CardData" screen to reflect the proper User Groups.
In Design Mode, double click on the screen CardData. This displays the CardData screen. Right click on the "Card Type:" data field to bring up the "Card Type Card Type" dialog. Switch to the "Source" tab.
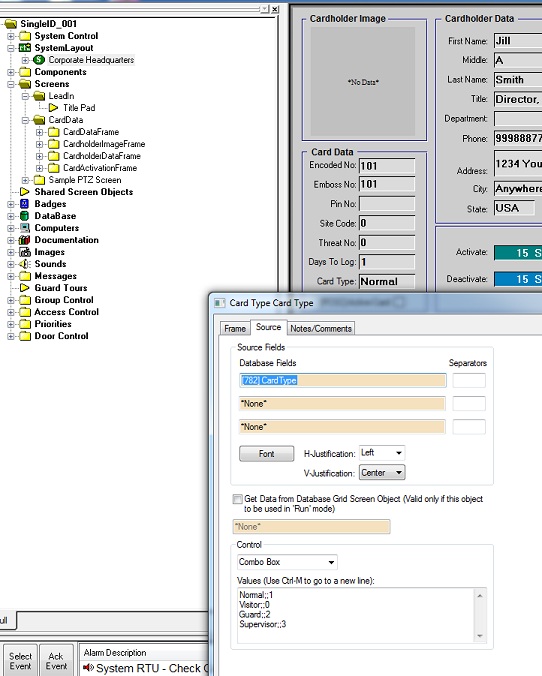
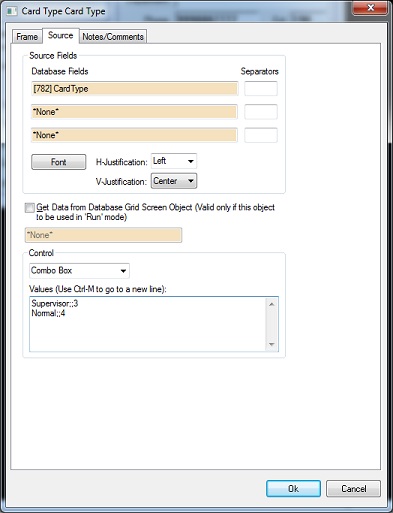
Remove all values except “Supervisor;;3”. Add a new value “Normal;;4”. Setting
a card to Supervisor allows the card to operate during Restriction while Normal
cards cannot.
Step 3. Download
your changes:
Send a
complete download to the panel to enable your DLT changes as well as the FDL
commands.